Sunday, November 6, 2011

Potato, Leeks and oh so yummy!

Waking up to a very cold morning, I decided I was going to make something warm and creamy.. Soup!! I looked through some ideas online and found a recipe for Potato and Leek Soup... Looked wonderfully warm.

I went to the store and bought the items I didn't have. When using leeks most people cut the dark green parts and throw it away.. I find that as a waste and will figure out something to do with them soon. Leeks are grown in sandy ground so you need to soak them. Easiest way for me was to slice them up and then soak them in a pan of water. All the sand and dirt will fall to the bottom of the pan.. Scoop the leaks into a strainer, don't pour or the dirty stuff with go with it.

As they were soaking; I cut up the potato, celery, and onion then threw them all into a pot to cook with some water, a bay leaf and some chicken broth. I then added half the leeks into the pot.


I let the mix simmer for about 15- 20 minutes.. As that was simmering I put a roux together with some bacon fat (I had in the fridge) and flour. The fat of the bacon needs to be completely melted before adding the flour. You can actually use any fat you want to make a roux but the bacon idea just sounds yummy. If you don't have bacon butter can be replaced.

I then added the rest of the leeks, cream, the roux, salt and pepper and fresh thyme in to simmer about 20 minutes. Then fished out the bay leaf I added earlier. 
 
I scooped up the veggies with a spoon that had slits in it to not add the broth and put it into a blender and pulsed it to make a thick yummy leeky goodness. I let it cook just a little bit more to thicken back up once it was all blended. The smells were amazing by this time and I was sooo very hungry and couldn't wait to try it. Once it was all done I served it up with some fresh sour dough bread. This recipe is such a keeper, everyone should try it!

Buon Appetito!


Monday, October 31, 2011

Halloween Cake Pops

While shopping one day for Halloween decorations  I came across a little orange witch decorated bowl.. and decided it would make a cute cake pop holder... I've been itching to make cake pops for some time now just never really had any ideas.  I got some cute little orange, black and white crinkle paper to fill the bowl.
I was sooooooooo excited! It looks super, super cute and really how hard could rolled up cake in candy coating be! (Boy I couldn't be more wrong)

  I baked the cake... 2 boxes of Red Velvet cake which made a 1/2 sheet cake. It looked pretty good after it was baked.. The side kinda over lapped a bit but really it was perfectly done for a boxed cake.


 Once the cake was out of the oven it has to completely cool, then it could be crumbled.. This was a very messy process.. I tried to use a fork to crumble it but it just wasn't working well. So it was time to get the hands dirty.. Once the crumbles were done and .. well crumbly..I added cake icing. Now... the cake pop people online say to use almost a whole can of icing with 1 boxed cake.. I personally used a whole can for 2 boxes.. it just seemed like it wouldn't be the right consistency to make into balls.. Plus it would be way to sweet. 

Now I have dirty hands with mushy sticky cake/icing and it was time to roll into balls... Now I made mine about half dollar size.. but I probably wouldn't do that again.. I would stick with maybe a quarter size ball. Make sure you have plenty of room to stick these into the freezer. I kept mine in about 20-30 minutes.


 I heated up some water in a sauce pan, then made a double boiler to melt the candy chips in. I only did a bit at this moment because I was going to dip the candy sticks into the melted candy and put them into the cake balls. If your wanting to color your candy chips.. I would suggest not to put regular food dye into this.. It ruined the smooth melted candy. You can only use oil based food dye.

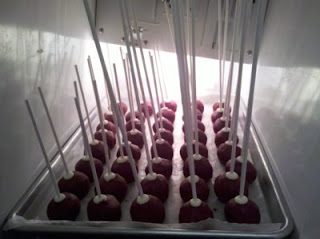
I stuck the candy sticks into the melted candy chips and then placed them each into a cake ball. In theory this is suppose to harden and make it more durable on the stick.

Once every cake pop had a stick I put it back into the freezer to harden up.

This process didn't take very long. Just a couple minutes until the candy was hardened. I grabbed a long candy stick and the short ones.. I seemed to like the short ones better in the end.


I melted more candy bits and dipped each cake piece into the mix. Don't stir it just kinda move the cake pops back and forth into the candy coating. I would suggest to get a big foam block to stick each in once out of the candy coating. If you put it back on the cookie sheet they get flat and not so nice looking coating.

Once the candy was dry on the cake pops I decorated them with an orange and black gel icing. This was by far not the easiest thing I have done.. It was a bit frustrating. I might do things a little differently another time.


I hope you enjoyed my little cake pop experience and check out what happens next!
Happy Halloween!